In this article we will teach you on how to setup Wordpress on google cloud's f1 compute instance. F1 Instance will provide 744 free hours per month which is equivalent to free hosting. If you have google cloud credits then you can utilize those as well. You can also avail this free tire limit to host static website on google cloud.
Prerequisite
Before we begin with actual installation we assume that you have already created account on google cloud. If you dont have google cloud account then please create account to follow this tutorial.
Install Wordpress from Marketplace
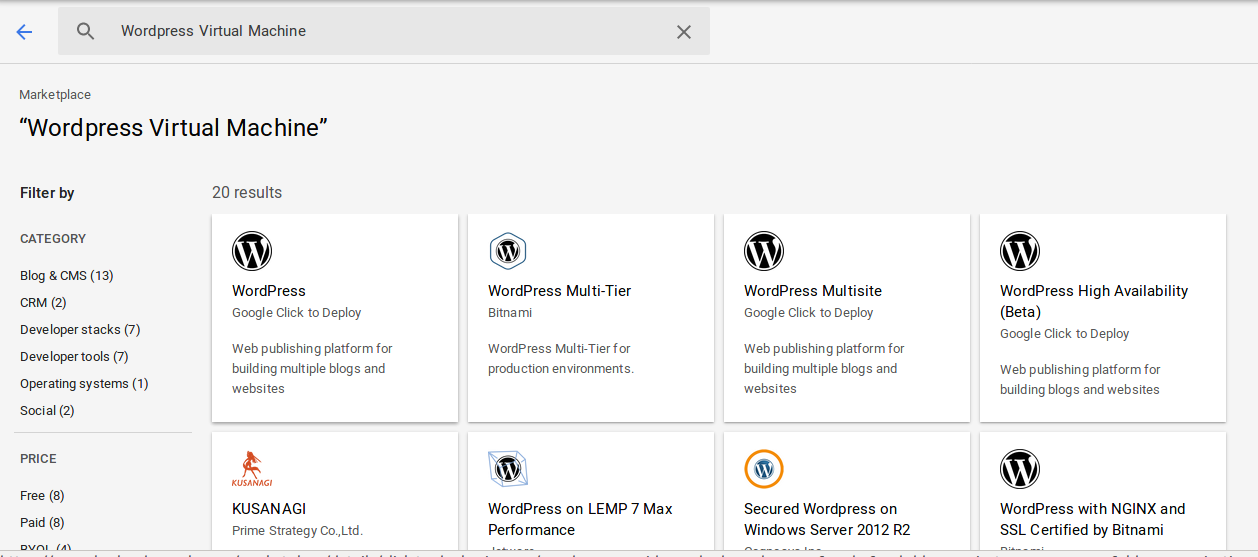
Open google cloud console and from menu open Marketplace. In marketplace search for Wordpress Virtual Machine and select Wordpress - Google Click to Deploy.

Launch Wordpress VM on Compute Engine Instance
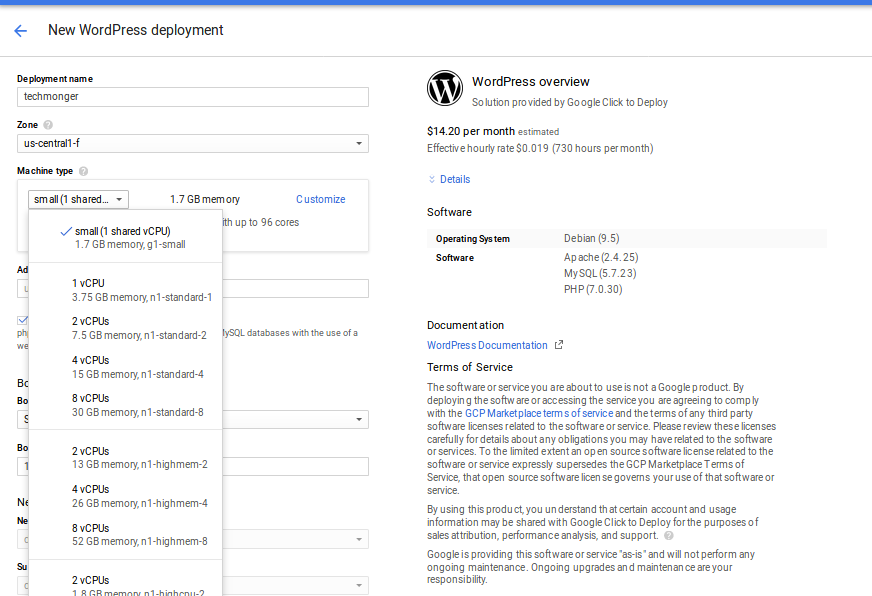
Launch VM with all defaults and provide email address. Make sure that phpmyadmin is selected during the launch.

Credentials and VM Details
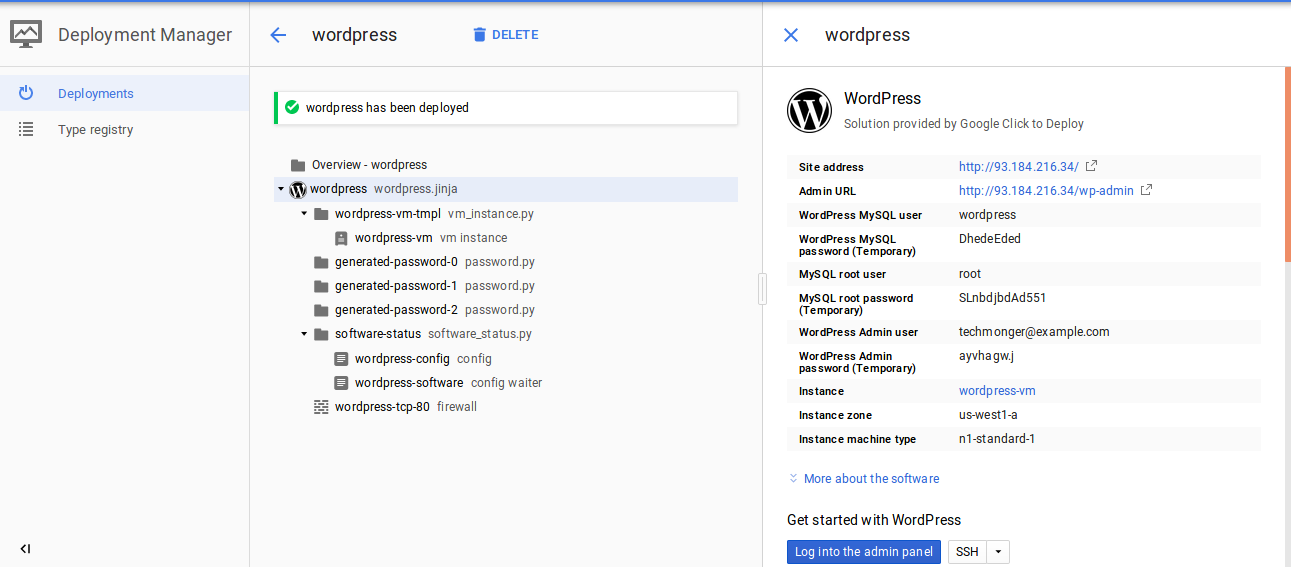
Once VM is launched you shall see page with VM details such as public ip address of the vm and wordpress credentials. With this VM you will get apache webserver, mysql database and phpmyadmin. 
Configure Compute Instance
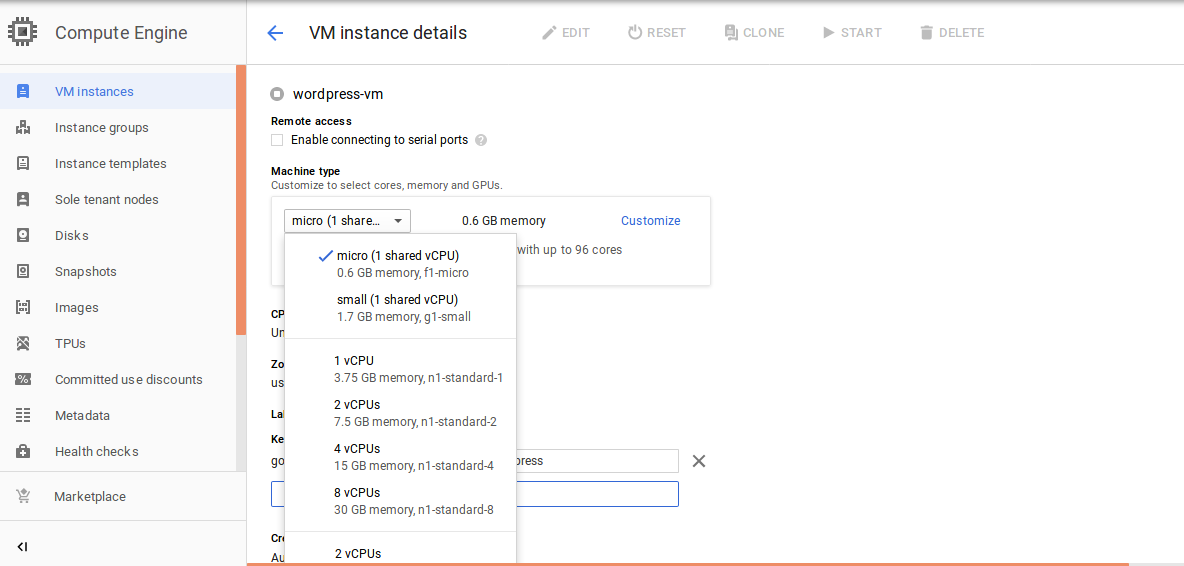
By default market place will let you assign minimum compute instance of n1. If you want to avail free instance then you will need to reduce instance to f1 micro. First Stop VM completely and click on Edit. Select Machine type as micro and click on Save. 
Administration
Open external IP address in browser to login Wordpress, Login with username admin and temporary wordpress password generated during VM launch.
To login inside vm you can either use in browser terminal or can configure public key based ssh. The advantage of configuring ssh is that you can also initiate sftp with VM from your local machine without additional configuration.
To access this wordpress site from domain name you should add external ip address as A Record in your domain administration console.
Security
You can also access wordpress mysql database in browser using phpmyadmin and generated credentials. However it is not advised to access phpmyadmin without secure (https) connection. To login phpmyadmin you would require to provide mysql root user password. With HTTP connection these details will be transferred in plaintext over internet and can potentially be compromised. To use phpmyadmin first configure https for wordpress using letsencrypt for free. Also change temporary wordpress admin password after enabling HTTPS.
Conclusion
We have setup free wordpress on google cloud using f1 micro instance. We have also learned how to secure your wordpress instance on compute engine.